
Summer is just around the corner.. Time to store those warm thick winter outfits away and say hello to minimalist outfits! We can show our skin as much as we want, take some pictures at the beach, drinking pina colada.. So, bikini, check! Sunglasses, check! Beach wave hair, check! How bout nails?
I like getting my nails done, but sometimes I'm too lazy to make a nail art by myself (yes, bcos the result will never be the same between right hand and left hand), and sometimes I feel like going to nail salon is too expensive and I can't change the nail art that often (let your nails breath for awhile)..
If you're like me, don't be sad girls, I have the solution for you and it called NAIL STICKER.. :D

In some countries, nail sticker is not a new thing.. But here in Indonesia, we have this products like a couple years ago, of course the one with good quality and cute designs.. One of them is LOLITATTOO.. At first they only sell temporary tattoo but then they expand the business to nail stickers.. They have a lot of designs, from minimalist to characters like Disney princess, from glitters to non-glitters.. The price is IDR30.000 (around US$2.00), same for all designs..
What I have here is the Sabrina design.. I chose Sabrina because I wanted to get the summer feeling but not the predictable ones like pineapple or flamingo.. As you can see on the pics below, they have the instructions at the back.. And 1 pack consists of 12 nail stickers and 1 nail buffer.. This was actually my first time using nail stickers.. So let's just start by following the instructions..
What I have here is the Sabrina design.. I chose Sabrina because I wanted to get the summer feeling but not the predictable ones like pineapple or flamingo.. As you can see on the pics below, they have the instructions at the back.. And 1 pack consists of 12 nail stickers and 1 nail buffer.. This was actually my first time using nail stickers.. So let's just start by following the instructions..


First, you have to start with clean nails and you can re-shape your nails if you want, pretty much the same when you want to apply nail polish, right? After that, you have to choose which sticker size that fits your nail.. Then, cut the nail stickers, remove the plastic wrap, then place it to your nail.. Firmly smooth the surface until wrinkle free.. If you have a small nails like me, you can cut the rest of the nail stickers gently using the nail buffer.. And just continue with the rest of your nails..
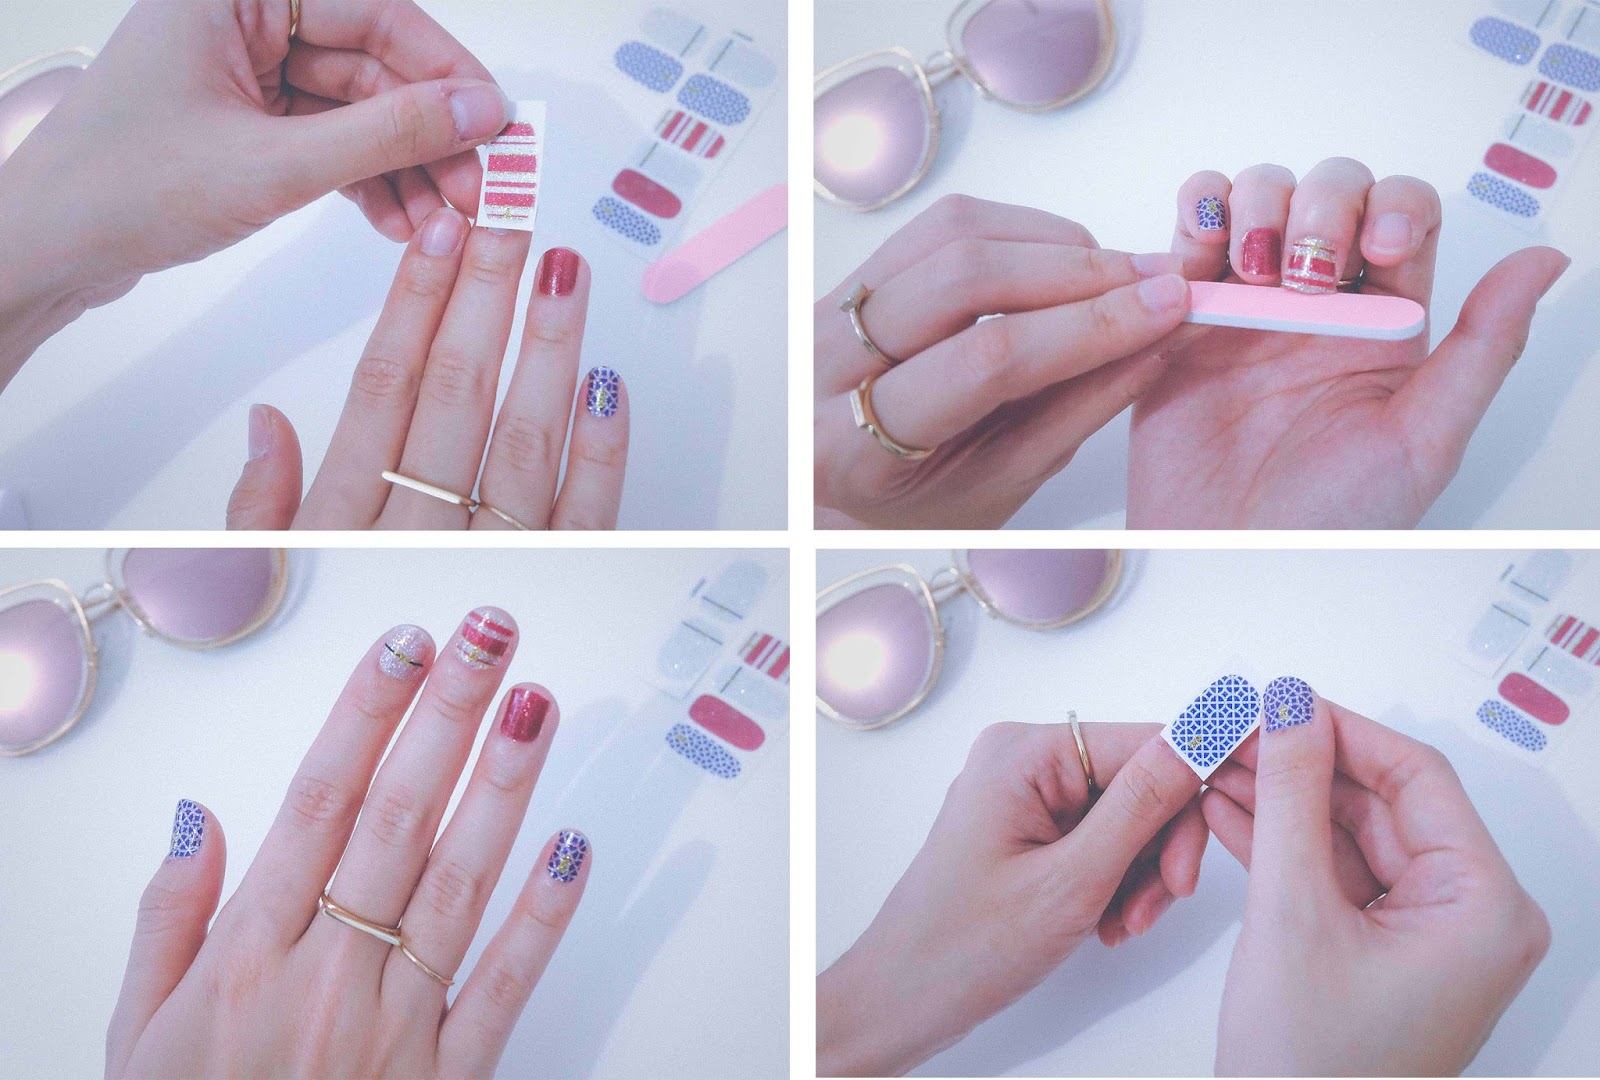

Once you're done, you can finish it with clear nail polish, but I didn't do it because I want it to be practical and nail polish free.. Very easy, right? I was surprised because at first I thought it will be very complicated, wrinkle here and there.. But it didn't and you can see it looked like a define nail art.. I chose to wear it the same pattern between my left and right hand but you can wear different way.. A little tips from me, it will be better if you wear this nail stickers after taking a bath so the glue will have more time to stick to your nails before contact with water..
Oh and I decided to post this simple tutorial after I went to Bali-Lombok last week (you'll know about this trip if you follow my Instagram).. So I went swimming at the beaches, swimming pool, eating seafood, climbing a tree, etc.. And I have to say this nail stickers amazed me even more.. They started to ripped off little by little after a week.. Maybe after this, I will choose another design to see how long will it last during normal activities..
I hope this post can help you girls and see you on the next post.. ;*
Love & Dream,
MM
Love your nails!! So cute ! :)x
ReplyDeleteVildana from Living Like V & Stalia Is BAE
amazing pics and mani!
ReplyDeletelovely post your nails looks beautiful i have never tried nail stickers before i think i need to try this
ReplyDeletesimplylovebeingme.blogspot.com
Lovely :) I like it :)
ReplyDeletewww.ivanasworld.com